
DIY Holiday Bows
Saturday, December 23, 2017
Christmas is a few days away and hopefully you all finished your holiday shopping! I wanted to share a D.I.Y. I learned a couple of days ago! I believe this would add an extra personal touch to your presents! It may take a while at first but once you get the hang of it, you'll finish this in less than 5 minutes! All you need is some paper and a pair of scissors! Let's get started!
[ 1 ] First things first... you will need a square sheet of paper. I didn't have any handy so I created a square from colored computer paper.

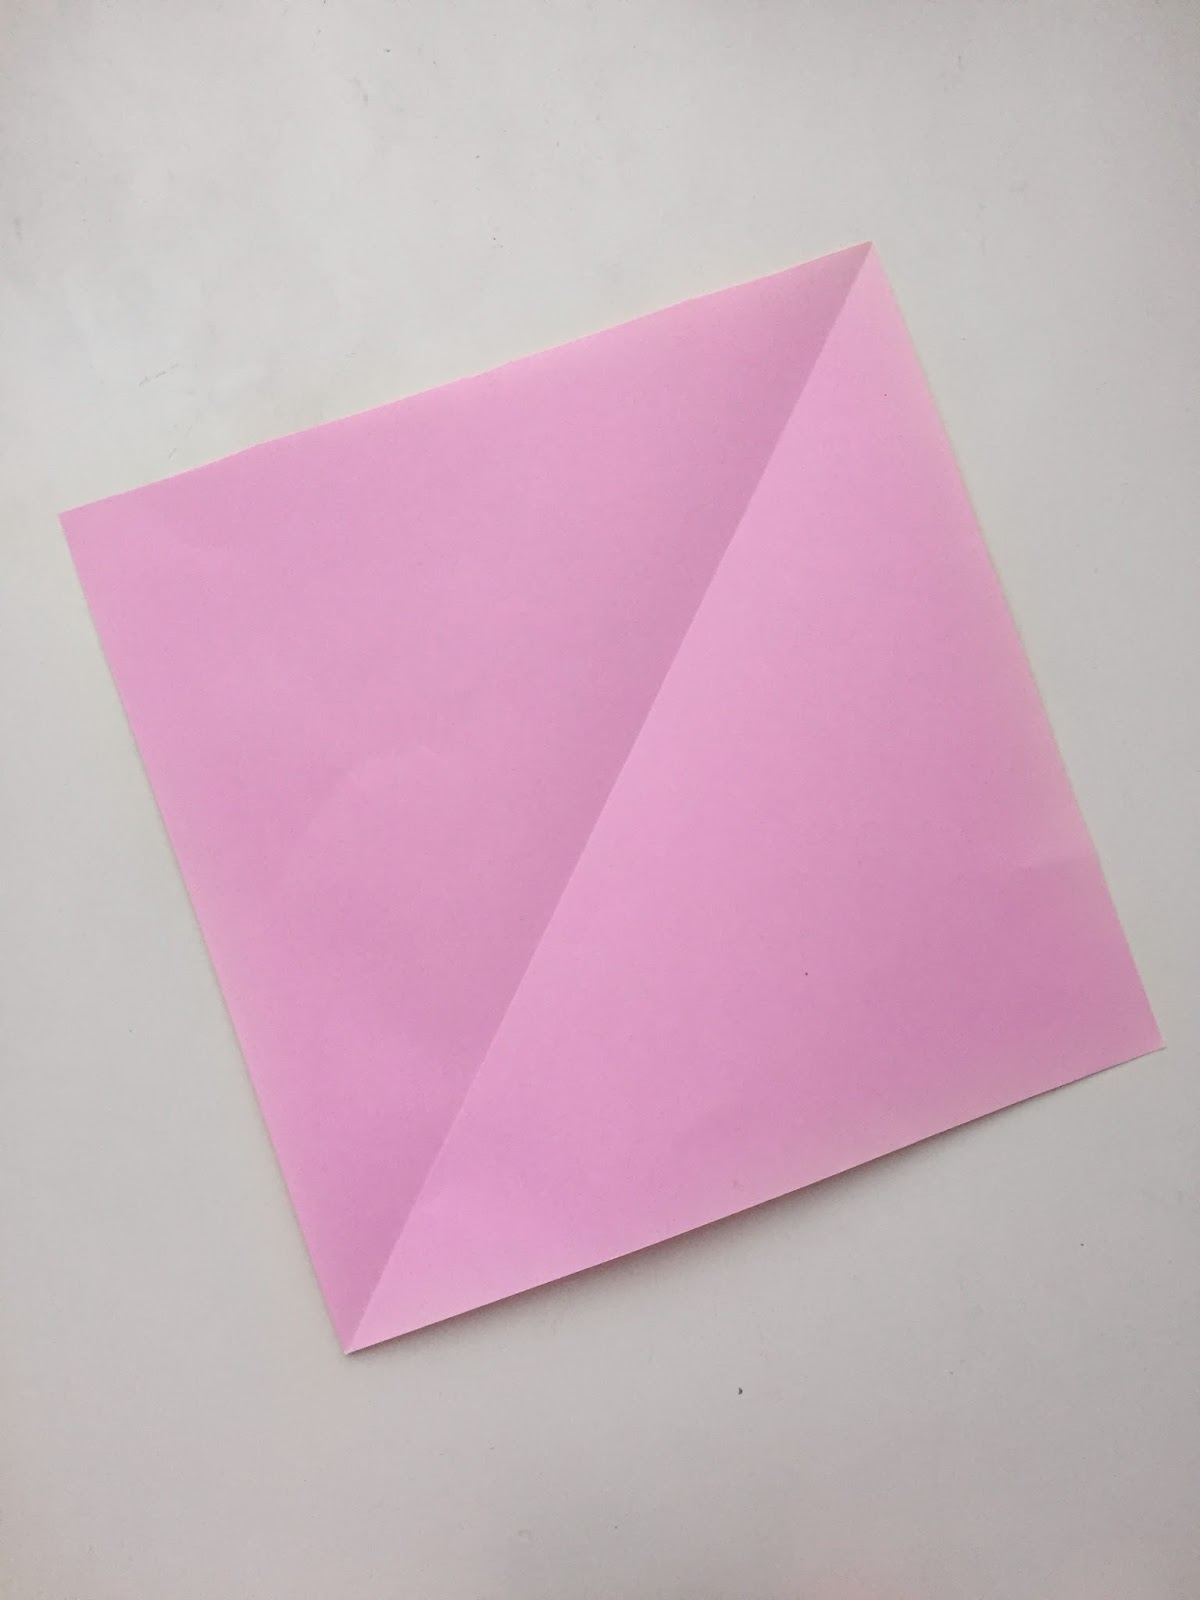
[ 2 ] Next, you'll want to fold the paper diagonally.

[ 3 ] Afterwards, fold the paper in half both ways. Your creases should end up looking like an asterisk.

[ 4a ] To make folding easier, make
sure your creases are prominent. You will then want to pick up two
edges that are on opposite sides of the square. Fold along the lines.


[ 4b ] LEFT: The inside of your "origami" should look like this. RIGHT: Arial view of your creation thus far.

[ 5 ] Fold the top tip of the triangle around half an inch down or to your liking. This will be the mid-section of the bow.


[ 6 ] Open your origami. You'll notice a smaller square in the center - make these creases prominent. Note that it doesn't have to be perfect.


[ 7a ] Defined creases in the center square will definitely make this step easier. Pick up your origami and push the center square down until it looks like the image on the right.


[ 7b ] LEFT: The view inside. RIGHT: Arial View.


[ 8 ] At the location where the small square was pushed down, fold that particular portion of the square inwards to the center divide (do this on both sides - front and back).


[ 9 ] LEFT: The front should look like this. RIGHT: The back should look like this.

[ 10a ] Flip the origami to the back side. On the parts that "pop" up, cut along the bottom crease to separate the front from the back side. Not sure how it should look? Scroll down to see the cutting results before proceeding.


[ 10b ] The cuts you made should separate the front portion from the back.


[ 11 ] I made little circles on my origami to make it easier for me to explain this step. On the bottom pieces (the ones with the circles), fold from the tip inwards towards the center line. You will be creating four right triangles as shown below.


[ 12 ] Flip the top square flap onto the other. Create right triangles on the left and right side.


[ 13 ] Follow the center crease and cut along the line towards the middle. TAKE CAUTION! AVOID cutting the square formed on the opposite face. Once you made your cut, fold to create obtuse triangles (Yay, for geometry!) Fold to your own preference! This step creates the tails of the bow.

[ 14 ] Flip your origami over and it should look like this!

[ 14 ] This step is pretty much self-explanatory! All you have to do is take one piece of the edge and wedge it under the square.

TAA-DAA! Your finished product should look something like this!

Now slap it onto your presents and cards!

I went a bit crazy and made them in various sizes! Hope you guys liked this DIY!
XO,
Adrienne
0 Comments